
string keyword="첫 필수구현";
1. unity 게임 개발 숙련
(1) 아이템과 상호작용


<ItemData>
public enum ItemType
{
    Resource,
    Equipable,
    Consumable
}

public enum ConsumableType
{
    Hunger,
    Health
}

[CreateAssetMenu(fileName = "Item", menuName = "New Item")]

public class ItemData : ScriptableObject
{
    [Header("Info")]
    public string displayName;
    public string description;
    public ItemType type;
    public Sprite icon;
    public GameObject dropPrefab;

    [Header("Stacking")]
    public bool canStack;
    public int maxStackAmount;
}
<ItemObject>
public class ItemObject : MonoBehaviour, IInteractable
{
    public ItemData item;

    public string GetInteractPrompt()
    {
        return string.Format("Pick up {0}", item.displayName);
    }

    public void OnInteract()
    {
        Destroy(gameObject);
    }
}
<InteractionManager>
public interface IInteractable
{
    string GetInteractPrompt();

    void OnInteract();
}

public class InteractionManager : MonoBehaviour
{
    public float checkRate = 0.05f;
    private float lastCheckTime;
    public float maxCheckDistance;
    public LayerMask layerMask;

    private GameObject curInteractGameobject;
    private IInteractable curInteractable;

    public TextMeshProUGUI promptText;
    private Camera camera;

    // Start is called before the first frame update
    void Start()
    {
        camera = Camera.main;
    }

    // Update is called once per frame
    void Update()
    {
        if(Time.time - lastCheckTime> checkRate)
        {
            lastCheckTime = Time.time;

            Ray ray = camera.ScreenPointToRay(new Vector3(Screen.width / 2, Screen.height / 2));
            RaycastHit hit;

            if(Physics.Raycast(ray, out hit, maxCheckDistance, layerMask))
            {
                if(hit.collider.gameObject != curInteractGameobject)
                {
                    curInteractGameobject = hit.collider.gameObject;
                    curInteractable = hit.collider.GetComponent<IInteractable>();
                    SetPromptText();
                }
            }
            else
            {
                curInteractGameobject = null;
                curInteractable=null;
                promptText.gameObject.SetActive(false);
            }
        }
    }

    private void SetPromptText()
    {
        gameObject.SetActive(true);
        promptText.text = string.Format("<b>[E]</b> {0}", curInteractable.GetInteractPrompt());
    }

    public void OnInteratInput(InputAction.CallbackContext callbackContext)
    {
        if(callbackContext.phase == InputActionPhase.Started && curInteractable !=null)
        {
            curInteractable.OnInteract();
            curInteractGameobject = null;
            curInteractable = null;
            promptText.gameObject.SetActive(false );
        }
    }
아이템을 만들고 플레이어가 가까이 가면 상호작용할 수 있는 텍스트가 뜨게 한다.
E키를 누르면 아이템을 먹을 수 있다.
2. 개인과제_ATM
(1) 기본 입출금 기능 만들기
어제 만들어둔 입,출금 UI들을 이제 하나하나 연결할 차례다.
<ButtonManager>
public TMP_Text cash;
public TMP_Text balance;
public GameObject panel;
public GameObject DScene;
public GameObject WScene;

public void PlusMoney(int money)
{
    bool _DScene = DScene.activeSelf;
    bool _WScene = WScene.activeSelf;

    int Intbalance = int.Parse(balance.text);
    int IntCash = int.Parse(cash.text);

    if (_DScene == true)
    {
        if (IntCash >= money)
        {
            Intbalance += money;
            IntCash -= money;
        }
        else
        {
            panel.SetActive(true);
        }
    }
    else if (_WScene == true)
    {
        if (Intbalance >= money)
        {
            Intbalance -= money;
            IntCash += money;
        }
        else
        {
            panel.SetActive(true);
        }
    }
    balance.text = Intbalance.ToString();
    cash.text = IntCash.ToString();
}

public void Check()
{
    panel.SetActive(false);
}
balance와 cash 텍스트를 int로 변환시켜 준 다음, 입금과 출금 어느 쪽이 켜져 있느냐에 따라 입금할지 출금할지를 정해뒀다. 그리고 다시 string으로 변환!
처음에는 입금과 출금이 켜질때를 어떻게 인식하도록 할 수 있을까 고민했는데, activeSelf라는 아주 똑똑한 놈이 있었다!
덕분에 하나의 스크립트로 입출금을 관리할 수 있게 되었다.
또 메서드에 int money를 인자로 넣어서 하나의 스크립트로 10,000원, 20,000원, 30,000원 버튼을 다 관리할 수 있다.
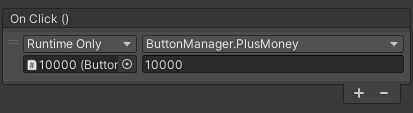
>> 이렇게 버튼마다 int값을 입력 가능!

>>잔액이 부족할 때 뜨는 패널.
(2) 직접입력 UI
직접입력 부분을 코드로 어떻게 구현할 지 검색해 보다가 Input Field TMP 라는 것을 써보기로 했다.

이렇게 유니티 플레이 중 직접 값을 입력할 수 있게 하는 UI이다.

>>Caret값을 조정하면 커서를 만들 수 있다.
<DirectInputt>
 public TMP_InputField directInput;
 public TMP_Text cash;
 public TMP_Text balance;
 public GameObject panel;
 public GameObject DScene;
 public GameObject WScene;

 public void DirectPlus()
 {
     bool _DScene = DScene.activeSelf;
     bool _WScene = WScene.activeSelf;

     int Intbalance = int.Parse(balance.text);
     int IntCash = int.Parse(cash.text);
     int IntDirectInput = int.Parse(directInput.text);

     if(_DScene==true)
     {
         if (IntCash >= IntDirectInput)
         {
             Intbalance += IntDirectInput;
             IntCash -= IntDirectInput;
         }
         else
         {
             panel.SetActive(true);
         }
     }
     else if(_WScene==true)
     {
         if (Intbalance >= IntDirectInput)
         {
             Intbalance -= IntDirectInput;
             IntCash += IntDirectInput;
         }
         else
         {
             panel.SetActive(true);
         }
     }

     balance.text = Intbalance.ToString();
     cash.text = IntCash.ToString();
     directInput.text = "";
 }
코드는 거의 동일하지만 기존의 money대신 Input Field TMP에서 적어넣는 숫자를 가져오게 바꾸었다.

전체적인 UI도 깔끔하게 나온 것 같다.
마무리
오늘 국취제 상담때문에 오전에는 거의 공부를 못했는데, 그런 것 치고는 강의도 1강 듣고 과제도 완성했다.
처음으로 개인과제를 필수구현을 모두 넣어서 구현했다.
매우매우 뿌듯하다!
이번 과제가 쉬운 것일까 내가 그래도 아주 조금이라도 실력이 늘은 것일까...?
과제가 조금 쉬운 것 같기는 하다ㅋㅋ

.
.
.
with 용아 눈을 왜 그렇게 떠..?
'개발자_뉴비일지' 카테고리의 다른 글
| 내일배움캠프 Unity 35일차 TIL - START TeamProject03 (0) | 2024.02.14 |
|---|---|
| 내일배움캠프 Unity 33일차 TIL - 배움의 즐거움 (1) | 2024.02.07 |
| 내일배움캠프 Unity 31일차 TIL - 버튼 (2) | 2024.02.05 |
| 주말 TIL_02 (1) | 2024.02.05 |
| 내일배움캠프 Unity 30일차 TIL - UI의 재미 (0) | 2024.02.02 |


